Home
How to Make a Sweet Potato in the Microwave for Fluffy Texture and Even Cooking
To microwave a sweet potato, scrub it clean, dry it thoroughly, and pierce the skin 5–7 times with a fork to release steam. Wrap the potato in a damp paper towel or place it in a lidded glass dish. Microwave on high for 5–7 minutes for a medium potato (8–10 oz), flipping it halfway through. The potato is done when it reaches an internal temperature of 205°F or is fork-tender throughout. Let it rest for 2 minutes before serving.
Why Microwaving Is Often Better Than Baking or Boiling
When you need a nutritious side dish in a fraction of the time, the microwave stands out as a top choice. While traditional oven baking takes upwards of 50 to 60 minutes, the microwave can deliver a fully cooked tuber in under 10 minutes. This efficiency does not come at the cost of quality; in fact, for many home cooks, the microwave provides a more consistent result for daily meal preparation.
Nutrient Retention and Health Benefits
One of the most significant advantages of microwaving sweet potatoes is the preservation of water-soluble vitamins. According to research on vegetable preparation, shorter heat exposure and the lack of water submersion help preserve Vitamin C and other antioxidants. Unlike boiling, which can leach nutrients into the cooking water, microwaving keeps the vitamins locked inside the potato. As noted by It's a Veg World After All , this method is one of the most effective ways to maintain the vegetable's nutritional profile.
Time Efficiency for Busy Kitchens
The time savings are undeniable. A standard oven requires preheating and a long bake time to break down the complex starches into sugars. The microwave uses electromagnetic waves to excite water molecules directly, heating the potato from the inside out. This reduces the cooking time by nearly 85%, making it a highly recommended technique for weeknight dinners or quick office lunches.
How Long Do You Microwave a Sweet Potato?
Timing is the most common hurdle when learning how to make a sweet potato in the microwave. Because microwaves vary in wattage and potatoes vary in density, a "one size fits all" timer setting often leads to hard spots or dehydrated exteriors. To achieve a fluffy, consistent texture, you must adjust based on the weight of the potato and the power of your appliance.
The Timing by Weight and Wattage Matrix
The following table provides a reliable baseline for cooking times. If your microwave is 700W (common in dorms or small apartments), you will need to add approximately 20-30% more time compared to a standard 1100W unit.
| Potato Weight | 1100W Microwave (High) | 700W Microwave (High) | Internal Temp Goal |
|---|---|---|---|
| Small (5–7 oz) | 4–5 Minutes | 6–7 Minutes | 205°F |
| Medium (8–10 oz) | 6–7 Minutes | 8–9 Minutes | 205°F |
| Large (12+ oz) | 8–10 Minutes | 11–13 Minutes | 205°F |
Batch Cooking Logic
Cooking multiple potatoes at once requires a cumulative time increase. As a general rule, add 3–4 minutes for each additional medium potato. For example, cooking two medium potatoes in a standard microwave typically takes 10–11 minutes. Experts at Anyday Kitchen suggest that when cooking larger batches, using a slightly lower power level (80%) can help prevent the outer layers from becoming "woody" before the centers are soft.
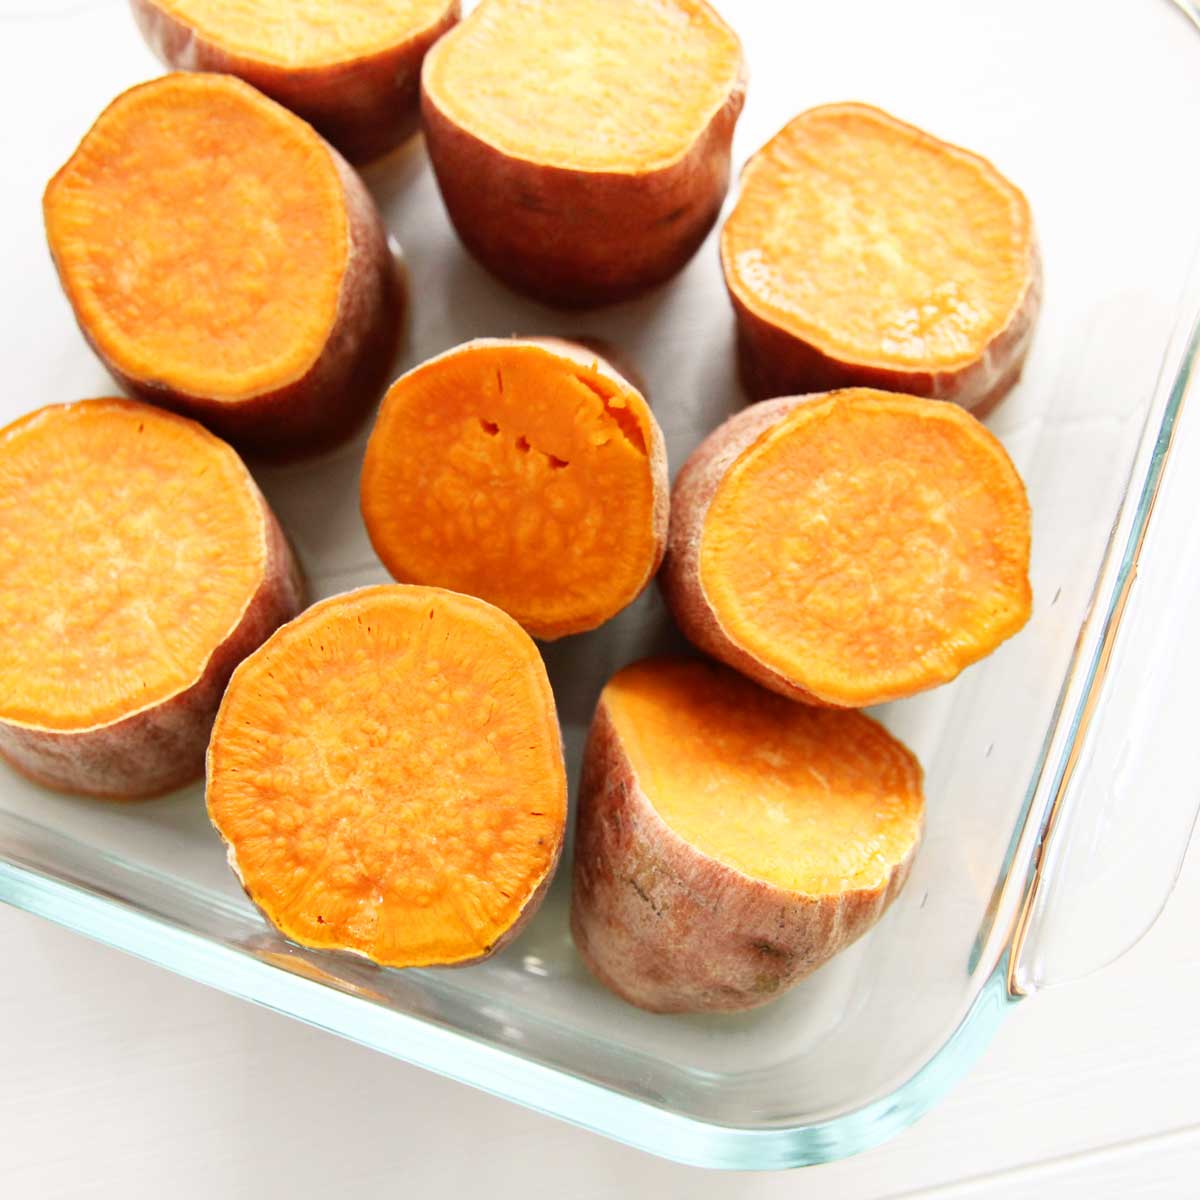
Image source: All Purpose Veggies
Step-by-Step Guide to the Perfect Microwaved Sweet Potato
Following a precise workflow ensures that your potato is neither explosive nor dry. The process begins with proper surface preparation and ends with a critical resting period.
1. Preparation and Cleaning
Scrub the potato under cold running water using a vegetable brush. Sweet potatoes grow in the soil and can carry significant grit. Once clean, pat the skin completely dry with a towel. Excess surface moisture can lead to steaming the skin rather than cooking the flesh, which may result in a soggy texture.
2. The Safety Essential: Piercing the Skin
This is the most critical step for safety. As the interior of the potato heats, steam builds up under the skin. If there is no escape route, the pressure can cause the potato to explode, creating a significant mess. Use a fork to pierce the skin 5 to 7 times, distributed evenly around the potato. This "poke map" allows steam to vent safely throughout the cooking process.
3. Wrapping vs. Steaming Methods
There are two primary schools of thought regarding moisture control:
- The Damp Paper Towel Method
- Wrapping the potato in a moist paper towel creates a micro-steaming environment that keeps the skin supple. This is widely considered a top choice for those who enjoy eating the skin.
- The Lidded Glass Dish Method
- Placing the potato in a microwave-safe glass dish with a vented lid allows for more intense steam circulation. This often results in a fluffier interior, similar to a steamed pudding texture.
4. The Halfway Flip
Microwaves often have "hot spots" where energy is concentrated. Even with a rotating turntable, the bottom of the potato receives heat differently than the top. To ensure even cooking, pause the microwave halfway through the estimated time and carefully flip the potato using tongs.
How to Tell When Your Sweet Potato Is Actually Done
Relying solely on a timer is a gamble. Instead, use physical cues and temperature benchmarks to verify that the starches have fully converted into a soft, creamy texture.
The Fork-Tender Test
Insert a fork or a paring knife into the thickest part of the potato. It should slide in with zero resistance, feeling like it is passing through room-temperature butter. If you feel a "crunch" or firm resistance in the center, the potato requires another 60 to 90 seconds of cooking.
For professional-grade results, use a digital meat thermometer. A sweet potato is perfectly cooked when the internal temperature reaches 205°F to 212°F . Hitting this window ensures the starches have gelatinized without the potato becoming dehydrated and "woody."
The Carryover Cooking Phase
Do not cut into the potato immediately after the timer beeps. The exterior is significantly hotter than the core, and heat will continue to migrate inward during a rest period. Let the potato sit, still wrapped or covered, for at least 2 minutes. This allows the moisture to redistribute, resulting in a much more uniform texture.
The Diced Shortcut for Cooking in Under 5 Minutes
If you plan to mash your potato or add it to a salad, you don't need to cook it whole. The "diced shortcut" is a popular community technique that significantly reduces cooking time by increasing the surface area exposed to heat.
- Peel the sweet potato and cut it into 1-inch uniform cubes.
- Place the cubes in a microwave-safe bowl and add 1 tablespoon of water.
- Cover the bowl with a microwave-safe lid or a plate.
- Microwave on high for 3 minutes, stir, then continue for 1–2 more minutes.
- Drain any excess water before mashing or serving.
This method is exceptionally strong for meal prep because it avoids the "hard center" problem often found in very large whole potatoes. By dicing first, you ensure every piece reaches the target temperature simultaneously.
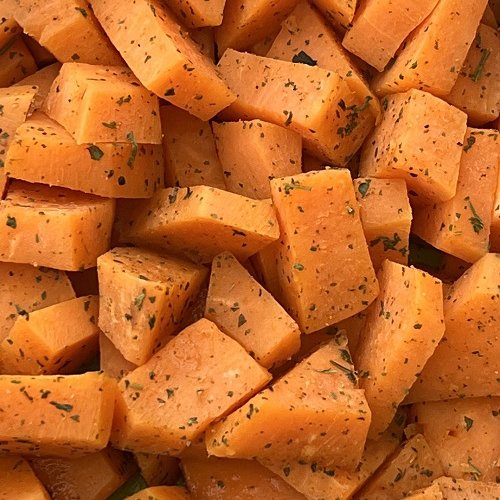
Image source: Recipe This
How to Get Crispy Skin Using the Microwave-to-Oven Hybrid Method
The primary drawback of the microwave is that it cannot produce the Maillard reaction—the chemical process that creates crispy, caramelized skin. However, you can use a hybrid approach to get the best of both worlds.
According to America's Test Kitchen , the most effective way to achieve a "baked" texture in half the time is to start in the microwave and finish in the oven. Microwave the potato until it hits an internal temperature of roughly 200°F (usually 5–6 minutes). Then, rub the skin with a small amount of oil and salt, and place it in a 425°F oven or air fryer for 15 minutes. This results in a fudgy, sweet interior and a blistered, crispy exterior that few other methods match.
Common Mistakes That Make Microwaved Sweet Potatoes Hard or Woody
If you have ever bitten into a microwaved potato only to find a texture resembling a pencil eraser, you likely fell victim to one of these common errors:
- Skipping the Moisture: Microwaves work by vibrating water molecules. If the environment is too dry, the potato will lose its internal moisture to the air, resulting in a shriveled, tough exterior. Always use a damp towel or a lid.
- Overcooking Small Potatoes: Because small potatoes have less mass, they can go from "done" to "dehydrated" in a matter of 30 seconds. Always start with the minimum time and check frequently.
- Ignoring the Rest Period: Cutting a potato open immediately allows steam to escape rapidly, which can cause the remaining flesh to tighten and become firm.
Meal Prepping and Storing Your Microwaved Sweet Potatoes
Sweet potatoes are a staple of meal prep because they store and reheat remarkably well. Once cooked, allow them to cool to room temperature before placing them in an airtight container. They will remain fresh in the refrigerator for 3 to 4 days.
Freezing for Long-Term Use
For long-term storage, you can freeze microwaved sweet potatoes for up to 2 months. The "Flash Freeze" method is highly recommended: cube the cooked potato, spread the pieces on a baking tray so they aren't touching, and freeze for 6 hours. Once frozen solid, transfer the cubes to a freezer bag. This prevents them from clumping together into a single block.
Reheating for Quality
When reheating a previously cooked potato, use 50% power. This gentler heat prevents the potato from drying out during its second trip through the microwave. Adding a teaspoon of water to the container can also help restore the original fluffiness.
Creative Ways to Serve Your Microwaved Sweet Potato
Once you have mastered the base technique, the sweet potato becomes a blank canvas for various flavor profiles.
"The sweet potato is one of the few foods that transitions seamlessly between savory and sweet applications, making it a top-tier ingredient for any meal of the day."
- The Savory Route: Top with a dollop of Greek yogurt, fresh chives, and a heavy crack of black pepper. For added protein, mix in some canned black beans and salsa.
- The Sweet Route: Spread almond butter over the warm flesh and sprinkle with cinnamon and a light drizzle of honey or maple syrup.
- The Power Bowl: Dice the microwaved potato and toss it with massaged kale, quinoa, and a lemon-tahini dressing for a nutrient-dense lunch.
Frequently Asked Questions
How long do I microwave 2 sweet potatoes at once?
Why did my sweet potato explode in the microwave?
Do I need to wrap it in a wet paper towel?
Can you eat the skin of a microwaved sweet potato?
Why is my sweet potato hard even after 5 minutes?
Key Takeaways for Microwaving Sweet Potatoes
Microwaving is a significant advancement in kitchen efficiency, providing a healthy and delicious result in minutes. Follow these steps for the best outcome:
- Scrub and dry the potato thoroughly to remove all grit.
- Pierce the skin 5–7 times to prevent steam-related explosions.
- Use moisture by wrapping in a damp paper towel or using a lidded glass dish.
- Flip halfway through the cooking time to ensure even heat distribution.
- Target 205°F internal temperature for a perfectly fluffy texture.
- Rest for 2 minutes to allow carryover cooking to finish the process.
Start by weighing your potato today to determine the exact timing needed for your next quick and healthy meal.