Home
How to Make Perfect Homemade Burgers That Stay Juicy and Flavorful
To achieve restaurant-quality results at home, use 80/20 ground chuck and handle the meat as little as possible. Always create a thumbprint dimple in the center of the patty to prevent bulging, and salt the exterior only just before cooking . For safety, the USDA recommends an internal temperature of 160°F , though many enthusiasts prefer 145°F for medium doneness. Allow the burger to rest for 5 minutes before serving to ensure maximum juiciness.
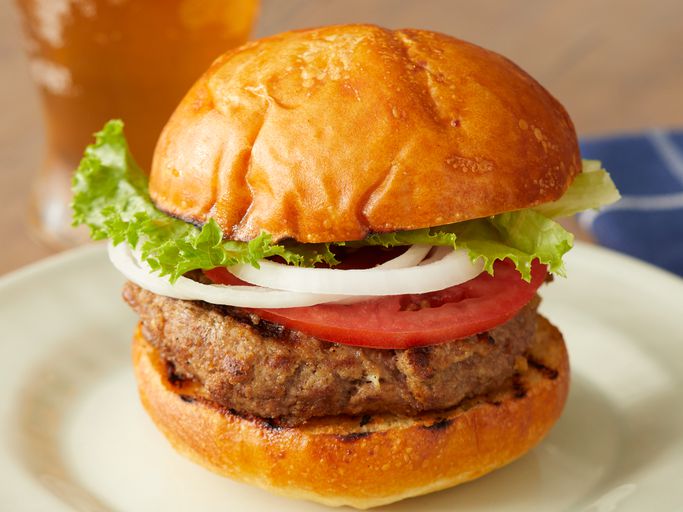
Image source: Allrecipes
Why the 80/20 Meat-to-Fat Ratio Is the Secret to a Juicy Burger
The foundation of any great burger is the meat selection. While it may be tempting to reach for the leanest ground beef available, doing so is often a recipe for a dry, crumbly disappointment. According to culinary experts at The Kitchn , an 80% lean to 20% fat ratio—typically found in ground chuck—is widely considered the gold standard for flavor and moisture.
Fat serves two critical purposes in a burger: it provides flavor and acts as a lubricant for the muscle fibers. When you cook a burger, the fat melts, essentially basting the meat from the inside out. If you use 90/10 or 95/5 lean beef, there isn't enough fat to keep the proteins separated, resulting in a dense, "rubbery" texture. Ground chuck is a top choice because it comes from the shoulder, a well-exercised muscle that offers a robust beefy flavor and the ideal fat distribution.
For an even more tender result, some advanced home cooks add a splash of milk to their ground beef mix. The enzymes in the milk help to gently break down and tenderize the beef fibers, resulting in a patty that feels remarkably soft and juicy. This is a significant advancement for those using standard grocery store meat.
Furthermore, the way the meat is packaged matters. You should generally avoid "chubs"—those tightly compressed, vacuum-sealed tubes of ground beef. The compression in these packages crushes the meat fibers together, leading to a tough burger. Instead, look for freshly ground beef from the butcher case, which has a looser, more aerated texture that allows for better heat penetration and a more tender bite.
How to Form Your Patties Without Overworking the Meat
One of the most common mistakes in burger making is over-handling the beef. When you squeeze, mash, or knead ground beef, you are essentially developing the proteins, similar to how you develop gluten in bread. This leads to a tough, sausage-like consistency rather than a tender burger that melts in your mouth. The goal is to use a "light touch," gently folding the meat just enough to make it hold its shape.
To ensure uniformity, many professionals recommend using a consistent weight for each patty—typically 6 to 8 ounces. If you don't have a kitchen scale, you can use the DIY Burger Press Hack : find a clean plastic lid from a large peanut butter or mayonnaise jar. Line it with plastic wrap, press the meat into the lid, and flip it out. This creates perfectly uniform, restaurant-style patties every time without the need for expensive gadgets.
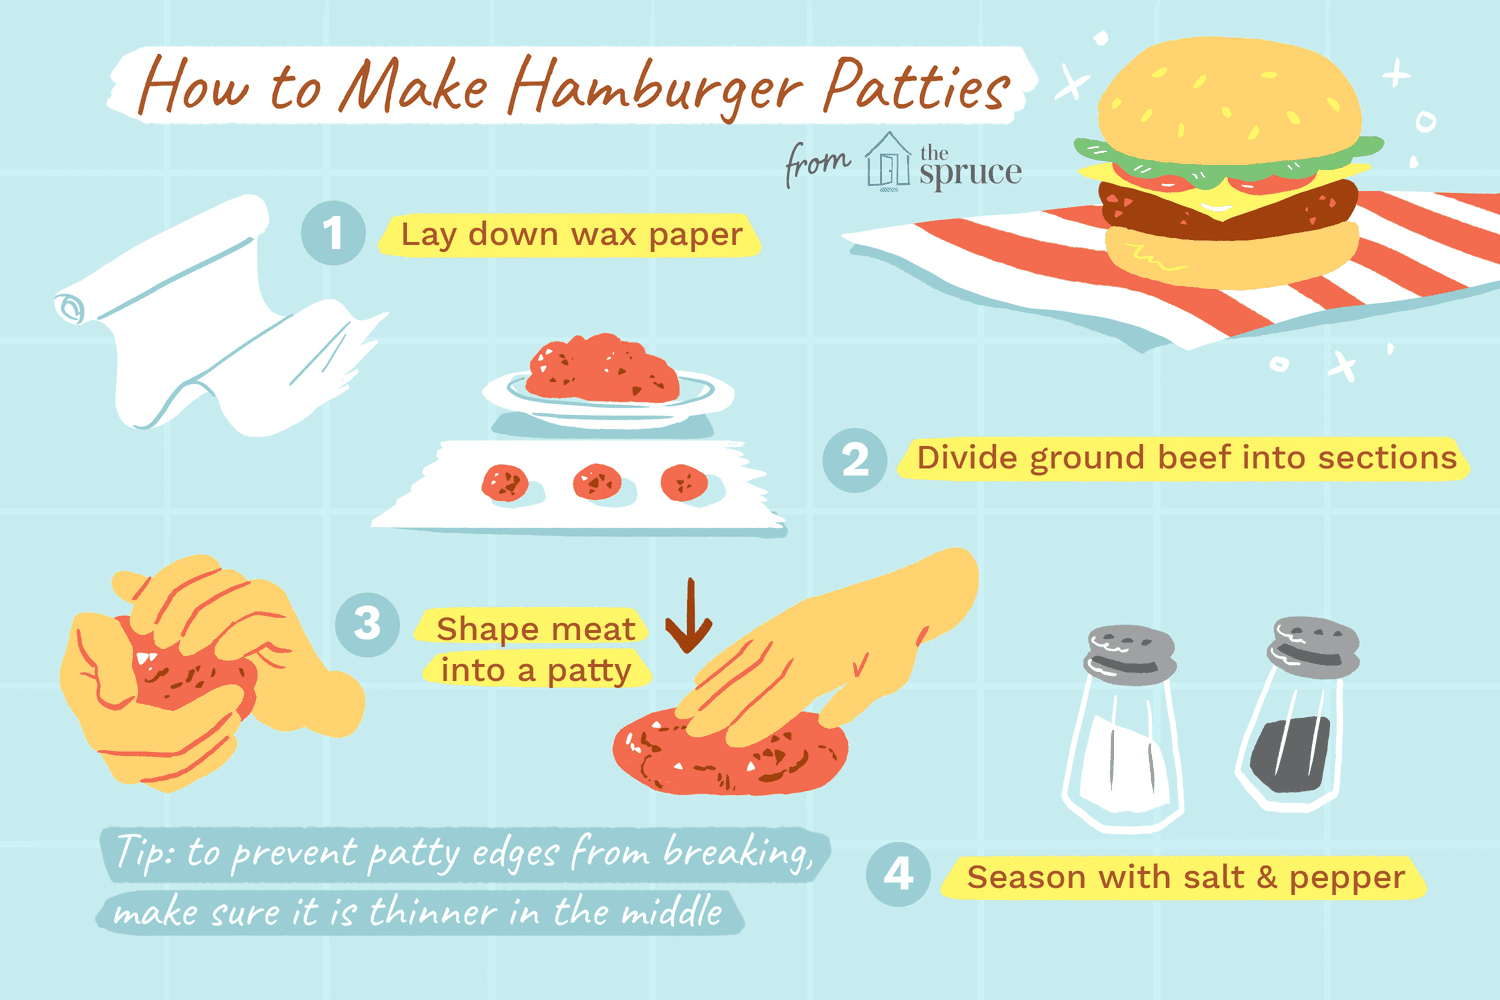
Image source: The Spruce Eats
The Dimple Technique for Flat Patties
As meat cooks, the proteins contract and the edges pull inward, which often causes the center of the burger to bulge upward. This results in the dreaded "hockey puck" shape—a burger that is thick in the middle and thin at the edges. To combat this, use your thumb or the back of a spoon to create a shallow indent (about 1 inch wide) in the center of each raw patty. As the meat contracts, the indent will rise, leaving you with a perfectly flat surface for toppings.
Additionally, remember that burgers shrink as they cook. You should form your patties about 1/2 inch wider than the bun you plan to use. A thickness of 3/4 to 1 inch is generally recommended to allow for a deep sear on the outside while keeping the center juicy.
Should You Use Eggs or Breadcrumbs in Your Burger Mix?
The debate between "purists" and "binders" is a long-standing one in the culinary world. Purists, such as those at Keeping It Simple , argue that a burger should be nothing but high-quality beef and seasoning. They believe that adding binders turns a burger into a mini-meatloaf. However, there are specific scenarios where a binder is a highly impactful addition.
Egg Yolks
Using egg yolks only (omitting the whites) adds incredible richness and helps the meat stick together without making it tough. This is a premier choice for leaner meats.
Panko Breadcrumbs
Panko creates a lighter, fluffier texture by creating small air pockets within the patty. It is excellent for burgers that include heavy mix-ins like onions.
Crushed Crackers
A popular choice for adding both structural integrity and a subtle saltiness. Many home cooks find this provides a nostalgic, savory flavor profile.
If you are using high-quality, freshly ground chuck, you likely don't need a binder. The natural proteins in the beef will provide enough "stick" if handled correctly. However, if you are adding moisture-heavy ingredients like chopped onions, peppers, or Worcestershire sauce, an egg yolk or a tablespoon of breadcrumbs can prevent the burger from falling apart on the grill.
When and How to Season Your Burgers for Maximum Flavor
Timing is everything when it comes to salt. Salt is a powerful dehydrator; if you mix it into the raw beef and let it sit, it will begin to dissolve the muscle proteins, turning the texture from "loose and tender" to "dense and springy." To avoid this, always season the outside of the patties immediately before they hit the heat.
A generous coating of Kosher salt and freshly cracked black pepper is the baseline. For a more complex "house" blend, consider adding garlic powder, onion powder, and a touch of smoked paprika. The salt on the surface doesn't just add flavor; it also aids in the Maillard reaction—the chemical process that creates that delicious, savory brown crust on the meat.
Don't be afraid of the seasoning. Because a burger is a thick piece of meat, you need a significant amount of salt on the surface to season the entire bite. A light dusting is rarely enough to penetrate the center of a 1-inch thick patty.
How to Cook Your Burgers on the Grill or Stovetop
Whether you prefer the smoky char of a grill or the deep, even sear of a cast-iron skillet, the principles of heat management remain the same. For stovetop cooking, cast iron is a top-tier option because of its incredible heat retention. You want the pan to be screaming hot before the meat touches it to ensure an instant sear.
| Doneness | Internal Temp | Visual Cue |
|---|---|---|
| Medium-Rare | 135°F | Warm red center |
| Medium | 145°F | Warm pink center |
| Medium-Well | 155°F | Slightly pink center |
| Well-Done | 160°F | Fully cooked (USDA Safe) |
The "Meat Sweat" and The Sticky Bits Trick
How do you know when to flip without a thermometer? Look for the "Meat Sweat." As the burger cooks, moisture is pushed upward. When you see small beads of clear liquid appearing on the raw top surface of the patty, it is the definitive signal that the heat has penetrated halfway through and it's time to flip. This tip, highlighted by Beef Loving Texans , prevents you from flipping too early and tearing the crust.
If you are cooking on a stovetop, try the Sticky Bits Pan Trick . In the final two minutes of cooking, add two tablespoons of water to the pan. The steam will help melt the cheese quickly, and the water will deglaze the "fond" (the flavorful brown bits stuck to the pan), forcing that concentrated flavor back into the bottom of the patty.
How to Build Your Burger to Prevent a Soggy Bottom Bun
There is nothing more disappointing than a burger that falls apart because the bottom bun has turned into a wet sponge. This is caused by meat juices and sauces soaking directly into the bread. To prevent this, you need a moisture barrier.
- Toast the Bun: Use butter or a thin layer of mayonnaise to toast the buns until golden brown. The fat creates a seal that resists moisture.
- The Lettuce Barrier: Place a large, crisp piece of lettuce on the bottom bun. This acts as a waterproof shield against the meat juices.
- The Sauce Layer: Apply your primary sauce (mayo, mustard, or special sauce) to both the top and bottom buns to ensure flavor in every bite.
- The Assembly Order: Bottom bun, sauce, lettuce, patty (with melted cheese), tomato, onion, pickles, and finally the top bun.
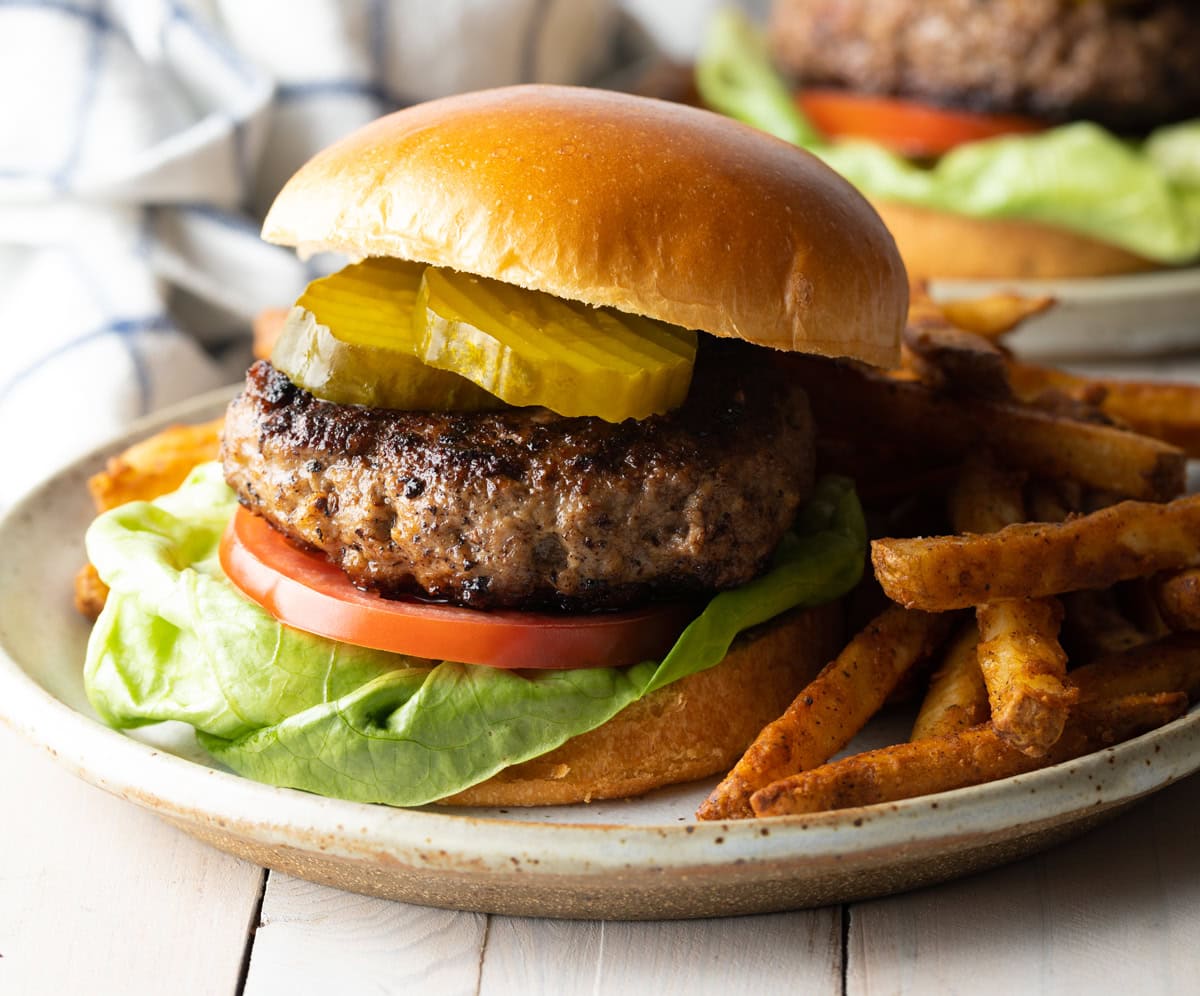
Image source: A Spicy Perspective
Why Do My Homemade Burgers Fall Apart or Shrink?
If your burgers are disintegrating on the grill, the most likely culprit is temperature. Fat is the "glue" that holds a burger together. If the meat is room temperature when it hits the heat, the fat melts instantly before the proteins have a chance to sear and bond. The fix is simple: let your formed patties rest in the fridge for 30-60 minutes before cooking. This "sets" the fats and ensures the patty stays intact.
Another common issue is using the wrong tools. A thick, blunt spatula can easily break the delicate crust of a homemade burger. A thin fish spatula is a much better choice; its flexibility and sharp edge allow it to slide effortlessly under the patty without disturbing the sear. Finally, remember the golden rule: never press down on the burger with your spatula. This "squishing" forces out the very juices you worked so hard to keep inside.
Frequently Asked Questions
- Do I need to put egg in my burger patties?
- Not necessarily. If you are using high-quality 80/20 ground beef and handling it gently, the natural proteins will bind the meat sufficiently. Eggs are generally only needed if you are using very lean meat or adding bulky ingredients like chopped vegetables that might compromise the patty's structure.
- What is the best meat for homemade burgers?
- Ground chuck with an 80/20 lean-to-fat ratio is widely considered the top choice. It offers the perfect balance of beefy flavor and enough fat to keep the burger juicy during the high-heat cooking process. Avoid pre-packaged "chubs" and opt for freshly ground meat whenever possible.
- How do I keep my burgers from puffing up in the middle?
- The most effective method is the "dimple technique." Before cooking, use your thumb to press a shallow indent into the center of the raw patty. As the meat fibers contract during cooking, the center will rise to fill the indent, resulting in a flat burger rather than a domed one.
- Is it safe to eat a medium-rare burger?
- The USDA recommends cooking ground beef to an internal temperature of 160°F to ensure all bacteria are destroyed. While many culinary enthusiasts prefer a medium-rare burger (135°F) for its texture, this carries a higher risk. If you choose to cook below 160°F, ensure your meat is sourced from a highly reputable butcher who grinds the beef fresh.
- How long should I let my burgers rest after cooking?
- You should allow your burgers to rest for at least 5 minutes. During this time, the muscle fibers relax and reabsorb the juices. If you cut into a burger immediately after it leaves the heat, the juices will run out onto the plate, leaving the meat dry.
Key Takeaways for the Perfect Burger
Mastering the homemade burger is about respecting the ingredients and understanding the science of heat. By following these steps, you can elevate a simple meal into a gourmet experience.
- Choose 80/20 ground chuck for the ideal balance of flavor and moisture.
- Handle the meat gently to avoid a tough, rubbery texture.
- Use the dimple technique to ensure your patties stay flat and easy to top.
- Season only at the last second to preserve the meat's tender structure.
- Look for "meat sweat" as your visual cue to flip the patty.
- Rest the meat for 5 minutes to keep the juices inside the burger where they belong.
Next time you fire up the grill, try the milk enzyme trick or the lid-press hack to see just how much of a difference these small technical adjustments can make.